m (→Maxing Stats on a GSR/GUR: updated not on imbalanced stats) Tag: sourceedit |
m (Reverted edits by 27.253.83.187 (talk) to last version by Kushieda minori) |
||
| (41 intermediate revisions by 8 users not shown) | |||
| Line 3: | Line 3: | ||
==Requirements== |
==Requirements== |
||
| − | Only some cards are available for Awakening. Cards that can be awakened will have a red star icon next to the evolution star(s). Cards that can awakened can also be viewed from the awakening screen. |
+ | Only [[:Category:Awakening|some cards]] are available for Awakening. Cards that can be awakened will have a red star icon next to the evolution star(s). Cards that can awakened can also be viewed from the awakening screen. |
| − | The special items needed for awakening are collectible through the [[Witch Gate]] |
+ | The special items needed for awakening are collectible through the [[Witch Gate]], [[Elemental Hall]], [[Treasure Hunt]]s, and [[Tower-Type Event]]s. Materials can also be upgraded or downgraded by using the [[Buildings#Awakening Lab|Awakening Lab]] building. The number of items required differs depending on the card's rarity. |
| − | |||
| − | {| class="article-table" border="1" style="white-space:nowrap" |
||
| − | ! colspan="4" align="center"| HSR available for Awakening |
||
| − | |- |
||
| − | ! style="width:25%" align="center"| [[File:Passion_Great.png|22px]] Passion |
||
| − | ! style="width:25%" align="center"| [[File:Cool_Great.png|22px]] Cool |
||
| − | ! style="width:25%" align="center"| [[File:Light_Great.png|22px]] Light |
||
| − | ! style="width:25%" align="center"| [[File:Dark_Great.png|22px]] Dark |
||
| − | |- valign="top" |
||
| − | | |
||
| − | {{Card Icon|Alchemist Ex}}<br /> |
||
| − | {{Card Icon|Alice}}<br /> |
||
| − | {{Card Icon|Amaterasu}}<br /> |
||
| − | {{Card Icon|Cacao}}<br /> |
||
| − | {{Card Icon|Ensemble}}<br /> |
||
| − | {{Card Icon|Firecracker}}<br /> |
||
| − | {{Card Icon|Hestia}}<br /> |
||
| − | {{Card Icon|Izumo No Okuni}}<br /> |
||
| − | {{Card Icon|Journalist}}<br /> |
||
| − | {{Card Icon|Omikoshi}}<br /> |
||
| − | {{Card Icon|Rokumonsen}}<br /> |
||
| − | {{Card Icon|Soul Eater}}<br /> |
||
| − | {{Card Icon|Zenobia}}<br /> |
||
| − | | |
||
| − | {{Card Icon|Alien}}<br /> |
||
| − | {{Card Icon|Cetus}}<br /> |
||
| − | {{Card Icon|Chaucer}}<br /> |
||
| − | {{Card Icon|Himiko}}<br /> |
||
| − | {{Card Icon|Leviathan Ex}}<br /> |
||
| − | {{Card Icon|Orihime}}<br /> |
||
| − | {{Card Icon|Umbrella Phantom}}<br /> |
||
| − | {{Card Icon|Saketoke}}<br /> |
||
| − | {{Card Icon|Sigrun}}<br /> |
||
| − | {{Card Icon|Skadi}}<br /> |
||
| − | {{Card Icon|Spade}}<br /> |
||
| − | {{Card Icon|White Night}}<br /> |
||
| − | {{Card Icon|Zephyrus}}<br /> |
||
| − | | |
||
| − | {{Card Icon|Astraea}}<br /> |
||
| − | {{Card Icon|Celestial Hades}}<br /> |
||
| − | {{Card_Icon|Chronos}}<br /> |
||
| − | {{Card Icon|Flora}}<br /> |
||
| − | {{Card Icon|Kiki}}<br /> |
||
| − | {{Card Icon|Lock Heart}}<br /> |
||
| − | {{Card Icon|Metatron}}<br /> |
||
| − | {{Card Icon|Parvati}}<br /> |
||
| − | {{Card Icon|Penemue}}<br /> |
||
| − | {{Card Icon|Polaris}}<br /> |
||
| − | {{Card Icon|Qilin}}<br /> |
||
| − | {{Card Icon|Saint}}<br /> |
||
| − | {{Card Icon|Thor}}<br /> |
||
| − | {{Card Icon|Uriel}}<br /> |
||
| − | | |
||
| − | {{Card Icon|Adonis}}<br /> |
||
| − | {{Card Icon|Balam}}<br /> |
||
| − | {{Card Icon|Candy}}<br /> |
||
| − | {{Card Icon|Corvus}}<br /> |
||
| − | {{Card Icon|Forneus}}<br /> |
||
| − | {{Card Icon|High Succubus}}<br /> |
||
| − | {{Card Icon|Infernal Hades}}<br /> |
||
| − | {{Card Icon|Joker}}<br /> |
||
| − | {{Card Icon|Joker (Cane)}}<br /> |
||
| − | {{Card Icon|Joker (Sickle)}}<br /> |
||
| − | {{Card Icon|Polar Night}}<br /> |
||
| − | {{Card Icon|Queen Succubus}}<br /> |
||
| − | {{Card Icon|Vampire}}<br /> |
||
| − | |- |
||
| − | | colspan="4" | '''Required Items:''' [[File:Passion Orb.png|22px]] Orb x1, [[File:Passion Stone (L).png|22px]] L Stone x5, [[File:Passion Stone (M).png|22px]] M Stone x10, [[File:Passion Stone (S).png|22px]] S Stone x15 |
||
| − | |} |
||
| − | |||
| − | {| class="article-table" border="1" style="white-space:nowrap" |
||
| − | ! colspan="4" align="center"| HUR available for Awakening |
||
| − | |- |
||
| − | ! style="width:25%" align="center"| [[File:Passion_Great.png|22px]] Passion |
||
| − | ! style="width:25%" align="center"| [[File:Cool_Great.png|22px]] Cool |
||
| − | ! style="width:25%" align="center"| [[File:Light_Great.png|22px]] Light |
||
| − | ! style="width:25%" align="center"| [[File:Dark_Great.png|22px]] Dark |
||
| − | |- valign="top" |
||
| − | | |
||
| − | {{Card Icon|Amaymon}}<br /> |
||
| − | {{Card Icon|Baton Twirler}}<br /> |
||
| − | {{Card Icon|Bookworm}}<br /> |
||
| − | {{Card Icon|Canele}}<br /> |
||
| − | {{Card Icon|Catcine}}<br /> |
||
| − | {{Card Icon|Furfur}}<br /> |
||
| − | {{Card Icon|Furries}}<br /> |
||
| − | {{Card Icon|Hebe}}<br /> |
||
| − | {{Card Icon|Hotline}}<br /> |
||
| − | {{Card Icon|Jack the Ripper}}<br /> |
||
| − | {{Card Icon|Jewel Girl}}<br /> |
||
| − | {{Card Icon|Kelvin}}<br /> |
||
| − | {{Card Icon|Kinkan}}<br /> |
||
| − | {{Card Icon|Loki}}<br /> |
||
| − | {{Card Icon|Louise}}<br /> |
||
| − | {{Card Icon|Magma}}<br /> |
||
| − | {{Card Icon|Megaera}}<br /> |
||
| − | {{Card Icon|Moira}}<br /> |
||
| − | {{Card Icon|Monkey}}<br /> |
||
| − | {{Card Icon|Pala}}<br /> |
||
| − | {{Card Icon|Phantom Ninja}}<br /> |
||
| − | {{Card Icon|Phoenix}}<br /> |
||
| − | {{Card_Icon|Pixie Servant}}<br /> |
||
| − | {{Card Icon|Prometheus}}<br /> |
||
| − | {{Card Icon|Santa Oracle}}<br /> |
||
| − | {{Card Icon|Sleipnir}}<br /> |
||
| − | {{Card Icon|Tefnut}}<br /> |
||
| − | {{Card Icon|Umbrella}}<br /> |
||
| − | {{Card Icon|Vermillion Victoria}}<br /> |
||
| − | | |
||
| − | {{Card Icon|Amatsukami}}<br /> |
||
| − | {{Card Icon|Arethusa}}<br /> |
||
| − | {{Card Icon|Charon}}<br /> |
||
| − | {{Card Icon|Chocolatier}}<br /> |
||
| − | {{Card Icon|Dainsleif}}<br /> |
||
| − | {{Card Icon|Dragon Goddess}}<br /> |
||
| − | {{Card Icon|Eden Maker}}<br /> |
||
| − | {{Card Icon|Fenrir}}<br /> |
||
| − | {{Card_Icon|Fleurety}}<br /> |
||
| − | {{Card Icon|Helen}}<br /> |
||
| − | {{Card Icon|Hyakki Yagyo}}<br /> |
||
| − | {{Card Icon|Jean}}<br /> |
||
| − | {{Card Icon|Juliet}}<br /> |
||
| − | {{Card Icon|Leona}}<br /> |
||
| − | {{Card Icon|Longinus}}<br /> |
||
| − | {{Card Icon|Marici}}<br /> |
||
| − | {{Card Icon|Oracle Ascendant}}<br /> |
||
| − | {{Card Icon|Princess Black Rose}}<br /> |
||
| − | {{Card Icon|Snow Bunny}}<br /> |
||
| − | {{Card Icon|Spell Master}}<br /> |
||
| − | {{Card Icon|Takemikazuchi}}<br /> |
||
| − | {{Card Icon|White Crane}}<br /> |
||
| − | {{Card Icon|White Russian}}<br /> |
||
| − | | |
||
| − | {{Card Icon|Al-mi'raj}}<br /> |
||
| − | {{Card Icon|Bahamut}}<br /> |
||
| − | {{Card Icon|Calligrapher}}<br /> |
||
| − | {{Card Icon|Dreamwalker}}<br /> |
||
| − | {{Card Icon|Dream Pillow}}<br /> |
||
| − | {{Card Icon|Drum Major}}<br /> |
||
| − | {{Card Icon|Ebisu}}<br /> |
||
| − | {{Card Icon|Fairy Princess}}<br /> |
||
| − | {{Card Icon|Fusehime}}<br /> |
||
| − | {{Card Icon|Graffiti Artist}}<br /> |
||
| − | {{Card Icon|Huang Long}}<br /> |
||
| − | {{Card Icon|Hygieia}}<br /> |
||
| − | {{Card Icon|Icarus}}<br /> |
||
| − | {{Card Icon|Kikimora}}<br /> |
||
| − | {{Card Icon|Lion Dancer}}<br /> |
||
| − | {{Card Icon|Lucia}}<br /> |
||
| − | {{Card Icon|Machinist}}<br /> |
||
| − | {{Card Icon|Midas}}<br /> |
||
| − | {{Card Icon|Mjolnir}}<br /> |
||
| − | {{Card Icon|Painter}}<br /> |
||
| − | {{Card Icon|Rikayu}}<br /> |
||
| − | {{Card Icon|Shiroyagi}}<br /> |
||
| − | {{Card_Icon|Super Iroha}}<br /> |
||
| − | {{Card_Icon|Wind Chime}}<br /> |
||
| − | {{Card Icon|Xuan Nu}}<br /> |
||
| − | {{Card Icon|Zeus}}<br /> |
||
| − | | |
||
| − | {{Card Icon|Amor}}<br /> |
||
| − | {{Card Icon|Anglerfish}}<br /> |
||
| − | {{Card Icon|Annaberge}}<br /> |
||
| − | {{Card Icon|Barista}}<br /> |
||
| − | {{Card Icon|Bonfire}}<br /> |
||
| − | {{Card Icon|Calamity}}<br /> |
||
| − | {{Card Icon|Cocina}}<br /> |
||
| − | {{Card Icon|Collapse}}<br /> |
||
| − | {{Card Icon|Cyaegha}}<br /> |
||
| − | {{Card Icon|Darling Doll}}<br /> |
||
| − | {{Card Icon|Diaochan}}<br /> |
||
| − | {{Card Icon|Failnaught}}<br /> |
||
| − | {{Card_Icon|Gargoyle}}<br /> |
||
| − | {{Card Icon|Ghost Rider}}<br /> |
||
| − | {{Card Icon|Gunsmith}}<br /> |
||
| − | {{Card Icon|Hamlet}}<br /> |
||
| − | {{Card Icon|Kiyohime}}<br /> |
||
| − | {{Card Icon|Necronomicon}}<br /> |
||
| − | {{Card Icon|Ouroboros}}<br /> |
||
| − | {{Card Icon|Poison Claw}}<br /> |
||
| − | {{Card Icon|Princess Iron Fan}}<br /> |
||
| − | {{Card Icon|Puppeteer}}<br /> |
||
| − | {{Card Icon|Redeye}}<br /> |
||
| − | {{Card Icon|Shadow Magician}}<br /> |
||
| − | {{Card Icon|Shuten-Doji}}<br /> |
||
| − | {{Card Icon|Soul Reaper}}<br /> |
||
| − | {{Card Icon|Yatagarasu}}<br /> |
||
| − | |- |
||
| − | | colspan="4" | '''Required Items:''' [[File:Passion Orb.png|22px]] Orb x2, [[File:Passion Stone (L).png|22px]] L Stone x10, [[File:Passion Stone (M).png|22px]] M Stone x15, [[File:Passion Stone (S).png|22px]] S Stone x20 |
||
| − | |} |
||
===Notes=== |
===Notes=== |
||
| − | * Item elements must match the card's element |
+ | * Item elements must match the card's element. |
| − | * For max stats, HSR/HUR Cards '''DO NOT''' have to be at max level when awakening, as the level has no effect. |
+ | * For max stats, HSR/HUR/HLR Cards '''DO NOT''' have to be at max level when awakening, as the level has no effect. ''For example, see [[Max Attack and Defense]]'' |
| − | ** However, HSR/HUR cards '''DO''' need to be perfectly evolved from max level SR/UR. |
+ | ** However, HSR/HUR/HLR cards '''DO''' need to be perfectly evolved from max level SR/UR/LR. |
*Awakening is not a guaranteed process. |
*Awakening is not a guaranteed process. |
||
**HSR cards have a 40% success rate. |
**HSR cards have a 40% success rate. |
||
| − | **HUR cards have a 20% success rate. |
+ | **HUR cards have a 20% success rate.<br /><small>'''Note:''' Some HUR cards have a lower chance of success. This is listed on each card's individual page.</small> |
| + | **HLR cards have a 15% success rate. |
||
**If awakening fails, the items used will be lost (but not the card). |
**If awakening fails, the items used will be lost (but not the card). |
||
| − | **[[Items#Arcana|Arcana]] available in the [[Elemental Hall]] can improve the chance of success |
+ | **[[Items#Arcana|Arcana]] available in the [[Elemental Hall]] can improve the chance of success. The Arcana (+5%, +10%, +15%, +20%, +25%) stack, allowing you to increase the chance of awakening by up to 75% |
===Example Awakening Steps=== |
===Example Awakening Steps=== |
||
| + | ====When The Awakened Card DOES NOT Have An Amalgamation==== |
||
| − | In order to get the best stats for your GSR and |
+ | In order to get the best stats for your GSR, GUR, and GLR cards, it's important to [[Evolution & Amalgamation|Evolve and Amalgamate]] your card properly before awakening. Let's look at [[Chocolatier]] as an example of this process. |
If you are going for a fully amalgamated GUR [[Chocolatier]], you would follow these steps: |
If you are going for a fully amalgamated GUR [[Chocolatier]], you would follow these steps: |
||
| Line 219: | Line 31: | ||
# You are now ready to Awaken your HUR. The HUR does not need to be max level |
# You are now ready to Awaken your HUR. The HUR does not need to be max level |
||
| + | For the most cost effective method of maxing the Attack and Defense of your awakened cards, see the [[Max Attack and Defense#Reducing_Cost_for_cards_available_for_Awakening|Max Attack and Defense]] page |
||
| − | === Maxing Stats on a GSR/GUR === |
||
| − | If you want to reduce Gold cost of increasing ATK and DEF of your new GSR or GUR, you can apply the arcana before Awakening. The gold cost is based on the card level, not the rarity. So a Level 1 N costs the same as a level 1 GUR. A level 90 card will cost 1860 per Arcana, while a level 80 card will cost 1660 gold per arcana. |
||
| + | ====When The Awakened Card DOES Have An Amalgamation==== |
||
| − | The best way way to save gold is to calculate the number of Arcana needed to max the GSR or GUR stats, then apply half while the card is still HSR or HUR (starting at level 1), and the other half after awakening (again starting at level 1). |
||
| + | In order to get the best stats for your GUR/GLR cards that have an Amalgamation step, it's important to [[Evolution & Amalgamation|Evolve and Amalgamate]] your card properly before awakening. Let's look at [[Cosplay Vamp]] as an example of this process. |
||
| + | If you are going for a fully amalgamated GUR [[Cosplay Vamp]], you would follow these steps: |
||
| − | For example, using our [[Chocolatier]] example above, the ATK at level 90 for a fully amalgamated version is 20904. So we calculate our needs as <code>(39999 - 20904) / 50 = 381.9</code>. This tells us we will need 382 arcana to reach the max stats on our Chocolatier. We would then apply the first 191 to the HUR version starting at level 1. After awakening, the card resets back to level 1 again. Now we apply the remaining 191 arcana to the GUR starting at level 1. |
||
| + | # [[Upgrade|Max the level]] of all 8 SR cards, 4 [[Zombina]] and 4 [[Hijack]] |
||
| + | # [[Evolution & Amalgamation|Evolve]] each pair of SR to get 4 HSR. Don't forget to use [[Items#Arcana|Arcana Succession]] |
||
| + | # [[Upgrade|Max the level]] of all 4 HSR, 2 [[Zombina]] and 2 [[Hijack]] |
||
| + | # [[Evolution & Amalgamation|Amalgamate]] the 2 pairs of HSR to get 2 UR [[Vamp]] |
||
| + | # [[Upgrade|Max the level]] of the 2 UR [[Vamp]] |
||
| + | # [[Evolution & Amalgamation|Evolve]] the 2 UR to get the HUR [[Vamp]]. Don't forget to use [[Items#Arcana|Arcana Succession]] |
||
| + | # You are now ready to Awaken your HUR. The HUR does not need to be max level |
||
| + | # After awakening, [[Upgrade|Max the level]] of the GUR [[Vamp]] |
||
| + | # Amalgamate GUR [[Vamp]] with X [[Halloween Cape]] to get GUR [[Cosplay Vamp]] |
||
| + | # You can now [[Max Attack and Defense]] of your [[Cosplay Vamp]]. You do not need to max her level |
||
| + | You do not want to apply any Attack or Defense arcana before the final step. |
||
| − | Many cards, like Chocolatier, have different values for ATK and DEF. In these cases, you can just take the Higher stat and work off that. The difference is usually negligible and would not have an impact on gold cost to bring the lower stat up to max after the card is already GSR or GUR. |
||
| − | [[Category:Mechanics & Gameplay]] |
||
==Effects== |
==Effects== |
||
| − | Once a card is awakened, the rarity of the card will change (HSR/HUR → GSR/GUR). In addition: |
+ | Once a card is awakened, the rarity of the card will change (HSR/HUR/HLR → GSR/GUR/GLR). In addition: |
*Basic stats will increase. |
*Basic stats will increase. |
||
*GSR Stat cap is 24,999. |
*GSR Stat cap is 24,999. |
||
*GUR Stat cap is 39,999. |
*GUR Stat cap is 39,999. |
||
| + | *GLR Stat cap is 150,000. |
||
| − | *Level cap will increase (70 for GSR, 90 for GUR). |
+ | *Level cap will increase (70 for GSR, 90 for GUR, 110 for GLR). |
*Skill will change. |
*Skill will change. |
||
| − | *"Awoken Burst" may activate in battle |
+ | *"[[Skills#Awoken Burst|Awoken Burst]]" may activate in battle |
| + | * During [[Tower-Type Event|Tower]] and [[Demon Realm Voyage]] events, the maximum damage a card can do while Awoken Burst is: |
||
| − | |||
| + | ** GSR, GUR: 10,000,000 |
||
| − | Awoken Burst is a skill that may activate randomly once per battle. It appears to have a 10% chance of activation. When it activates, the card's current soldiers, maximum soldiers and attack increase by +200% for GSR and +100% for GUR. Awoken Burst's effects last for 3 turns. When Awoken Burst ends, the card's current soldiers return to the normal maximum or stay the same if lower than the normal maximum. It may activate in battle at any time. This includes round 1 while on Defense as well as during a lockdown from a [[Skills#Turn Skip|Turn Skip Skill]]. |
||
| + | ** GLR: 30,000,000 |
||
==Carried Over After Awakening== |
==Carried Over After Awakening== |
||
Latest revision as of 01:01, 27 January 2020
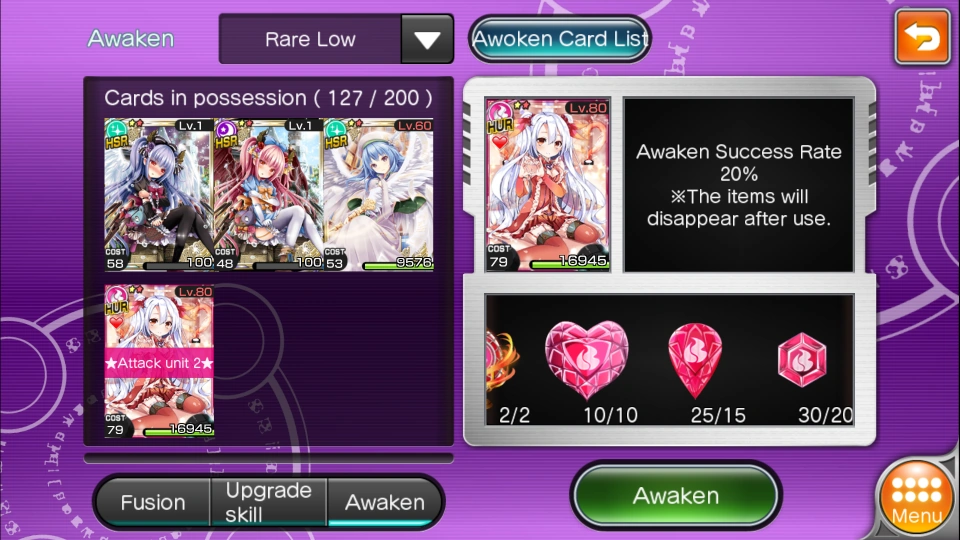
Awakening is a form of upgrading a card, which will increase its stats and improve its skill. This feature can be accessed in the Upgrade screen from the "Awaken" section located on the bottom left side.
Requirements
Only some cards are available for Awakening. Cards that can be awakened will have a red star icon next to the evolution star(s). Cards that can awakened can also be viewed from the awakening screen.
The special items needed for awakening are collectible through the Witch Gate, Elemental Hall, Treasure Hunts, and Tower-Type Events. Materials can also be upgraded or downgraded by using the Awakening Lab building. The number of items required differs depending on the card's rarity.
Notes
- Item elements must match the card's element.
- For max stats, HSR/HUR/HLR Cards DO NOT have to be at max level when awakening, as the level has no effect. For example, see Max Attack and Defense
- However, HSR/HUR/HLR cards DO need to be perfectly evolved from max level SR/UR/LR.
- Awakening is not a guaranteed process.
- HSR cards have a 40% success rate.
- HUR cards have a 20% success rate.
Note: Some HUR cards have a lower chance of success. This is listed on each card's individual page. - HLR cards have a 15% success rate.
- If awakening fails, the items used will be lost (but not the card).
- Arcana available in the Elemental Hall can improve the chance of success. The Arcana (+5%, +10%, +15%, +20%, +25%) stack, allowing you to increase the chance of awakening by up to 75%
Example Awakening Steps
When The Awakened Card DOES NOT Have An Amalgamation
In order to get the best stats for your GSR, GUR, and GLR cards, it's important to Evolve and Amalgamate your card properly before awakening. Let's look at Chocolatier as an example of this process.
If you are going for a fully amalgamated GUR Chocolatier, you would follow these steps:
- Max the level of all 8 SR cards, 4 Red String and 4 Claudius
- Evolve each pair of SR to get 4 HSR. Don't forget to use Arcana Succession
- Max the level of all 4 HSR, 2 Red String and 2 Claudius
- Amalgamate the 2 pairs of HSR to get 2 UR Chocolatier
- Max the level of the 2 UR Chocolatier
- Evolve the 2 UR to get the HUR Chocolatier. Don't forget to use Arcana Succession
- You are now ready to Awaken your HUR. The HUR does not need to be max level
For the most cost effective method of maxing the Attack and Defense of your awakened cards, see the Max Attack and Defense page
When The Awakened Card DOES Have An Amalgamation
In order to get the best stats for your GUR/GLR cards that have an Amalgamation step, it's important to Evolve and Amalgamate your card properly before awakening. Let's look at Cosplay Vamp as an example of this process.
If you are going for a fully amalgamated GUR Cosplay Vamp, you would follow these steps:
- Max the level of all 8 SR cards, 4 Zombina and 4 Hijack
- Evolve each pair of SR to get 4 HSR. Don't forget to use Arcana Succession
- Max the level of all 4 HSR, 2 Zombina and 2 Hijack
- Amalgamate the 2 pairs of HSR to get 2 UR Vamp
- Max the level of the 2 UR Vamp
- Evolve the 2 UR to get the HUR Vamp. Don't forget to use Arcana Succession
- You are now ready to Awaken your HUR. The HUR does not need to be max level
- After awakening, Max the level of the GUR Vamp
- Amalgamate GUR Vamp with X Halloween Cape to get GUR Cosplay Vamp
- You can now Max Attack and Defense of your Cosplay Vamp. You do not need to max her level
You do not want to apply any Attack or Defense arcana before the final step.
Effects
Once a card is awakened, the rarity of the card will change (HSR/HUR/HLR → GSR/GUR/GLR). In addition:
- Basic stats will increase.
- GSR Stat cap is 24,999.
- GUR Stat cap is 39,999.
- GLR Stat cap is 150,000.
- Level cap will increase (70 for GSR, 90 for GUR, 110 for GLR).
- Skill will change.
- "Awoken Burst" may activate in battle
- During Tower and Demon Realm Voyage events, the maximum damage a card can do while Awoken Burst is:
- GSR, GUR: 10,000,000
- GLR: 30,000,000
Carried Over After Awakening
Some of the previous stats before awakening will be carried over:
- All ATK/DEF/Soldier stats gained from evolution and Arcana.
- Affection points (friendship level).
Not carried over:
- Card level (reset to 1).
- Skill level (reset to 1).